
IT Support
Adobe Acrobat and Adobe Creative Cloud
To note, you can only hold either an Adobe Creative Cloud or Adobe Acrobat subscription at a time. Adobe Creative Cloud includes Adobe Acrobat as well as the entire Adobe suite of apps including Photoshop, Illustrator, Premiere Pro. For more details on Adobe Subscription Renewals, click here.
Adobe Acrobat Only Installation Guide:
https://ubc.service-now.com/kb_view.do?sysparm_article=KB0017458
If you have already subscribed to Adobe Acrobat subscription, skip to the Step-By-Step: Install & Activate Adobe Software (Acrobat Pro) section.
Once you have reached the Step-By-Step: Install & Activate Adobe Software (Acrobat Pro) section, follow the installation guide for Personal Computers.
Adobe Creative Cloud Installation Guide:
https://ubc.service-now.com/kb_view.do?sysparm_article=KB0017459
If you have already subscribed to Adobe Acrobat subscription, skip to the Step-By-Step: Install & Activate Adobe Software (Creative Cloud) section.
Once you have reached the Step-By-Step: Install & Activate Adobe Software (Creative Cloud) section, follow the installation guide for Personal Computers.
UBC Zoom Account
UBC has a campus-wide license for Zoom as a platform for delivering courses online and larger meetings. Zoom is an easy-to-use video conferencing platform that offers a wide range of features.
Please request your Zoom account here: Request an Account
More information on Zoom, visit UBC IT – Zoom Video Conferencing
UBC Email (FASMAIL)
SETTING UP YOUR FASMAIL ACCOUNT
All UBC staff and faculty are eligible for a UBC FASmail account. Once your appointment is complete in Workday, our staff member will assist you in creating your UBC email. Contact cps.it@ubc.ca for assistance.
FASMAIL GENERAL INFORMATION
Learn about FASmail features, account holder eligibility, and other general information.
FASMAIL USAGE TRAINING GUIDES
Access training guides to help you manage your email, manage calendars, and more.
ACCESSING FASMAIL
WEBMAIL
You can log into your FASmail account from any browser via the UBC FASmail login portal using your CWL (Campus Wide Login) user name and password.
OUTLOOK
FASmail is accessible through Microsoft Outlook, the preferred platform at UBC. The Psychiatry IT team will be able to provide assistance in setting up access to FASmail through Outlook on your UBC-owned work computer. The basic functions of Outlook are available through webmail, however you cannot configure the sharing of your email or calendar to other FASmail users.
OTHER PLATFORMS AND DEVICES
For setting up FASmail access on other platforms and devices, please see these FASmail Set Up Documents for detailed step-by-step instructions.
UBC DIRECTORY & EMAIL ALIASES
The department sets up FASmail accounts with a firstname.lastname@ubc.ca primary email alias. Your alias is shown as firstname.lastname@ubc.ca and because of the simple format, making it easier for people to see who they are sending an email to.
When an email to an alias arrives at UBC, it will be redirected to your actual email account (yourcwl@mail.ubc.ca). The UBC Directory can be configured so that more than one alias (secondary aliases) can be directed to one email account. Typically, all mail sent from your account will appear to come from your primary alias.
SHARING YOUR FASMAIL CALENDAR
You can share your FASmail User calendar, to another FASmail User account holder (e.g. A faculty member shares their calendar, so that administrative staff can update their schedule). You must have your FASmail user account setup in Microsoft Outlook, to turn on sharing.
SHARING WITHIN OUTLOOK
- Start Outlook, logon with your CWL and view the calendar that you want to share, then click Calendar Permissions
- In the “Calendar Properties” window, select the “Permission Level” that you want to give the other FASmail User. In the case of an assistant, “Author” is frequently a good choice. It allows them to read your own calendar, add items, edit or delete their added items. You can also manually set their Read, Write and Delete settings.
- Click OK, to save and let the user you shared to know that they now have access to your calendar.
SHARING WITHIN WEBMAIL
- Browse to https://www.mail.ubc.ca and login with your FASmail/CWL account
- Click the Calendar category, on the left.
- Above your calendar, click Share, then Add Calendar…
- In the “Add Calendar” window, enter the name of the person, who’s calendar you want to view and click OK.
Canvas Account
Canvas is a powerful, user-friendly tool for supporting teaching and learning. A canvas account is required to start your on-boarding training.
Please request your Canvas account here: Canvas Sign-up
Cisco Security Endpoint
Cisco Security Endpoint is reserved for CPS Students and Faculty, and provides advanced cyber security protection against viruses and malware.
Download Link: (Password Protected), contact cps.it@ubc.ca for access
Microsoft Office for MacOS
To deploy Microsoft Office 2021 for Mac with a Volume License:
1. Download Link for Office Deployment Tool: (Password Protected), contact cps.it@ubc.ca for access
Microsoft Office 2021 Download
note: please use .pkg in this folder.
2. Install the Serializer package included in page above.
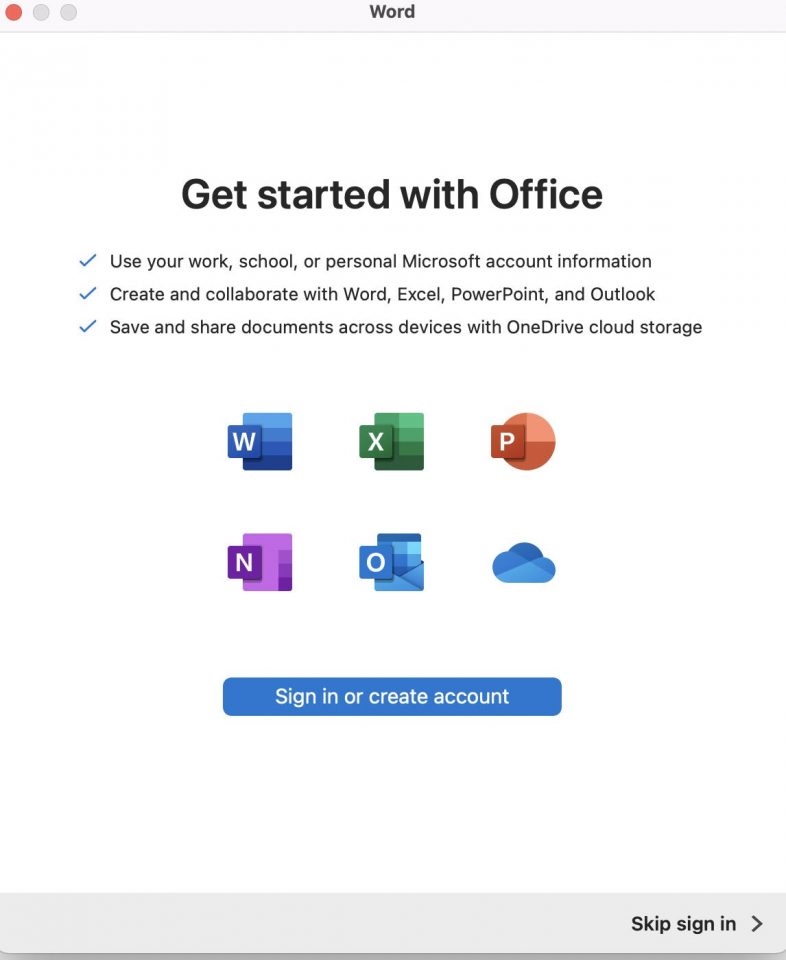
3. On first launch of any Office program (Word, Excel, Powerpoint), choose to skip sign-in on the bottom left to use the application:
Microsoft Office for Windows 10/11
Download Link for Office Deployment Tool: (Password Protected), contact cps.it@ubc.ca for access
Microsoft Office 2021/2024 Download
This guide explains the process of deploying Office 2024 on a Windows machine and activating it. Note: If Office 365 and OneNote is already installed on the computer, please uninstall them.
1. Open up windows file explorer and locate where Office deployment tool was saved to from the prior step (usually in download folder).
Windows 11:
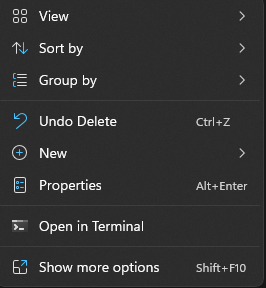
Open up windows file explorer and locate where Office deployment tool was saved to from the prior step. Once in, right click anywhere and click open in terminal:
Windows 10 or older
Step 1: Open up Command Prompt by searching up Command Prompt in the windows search bar and click Run as administrator.

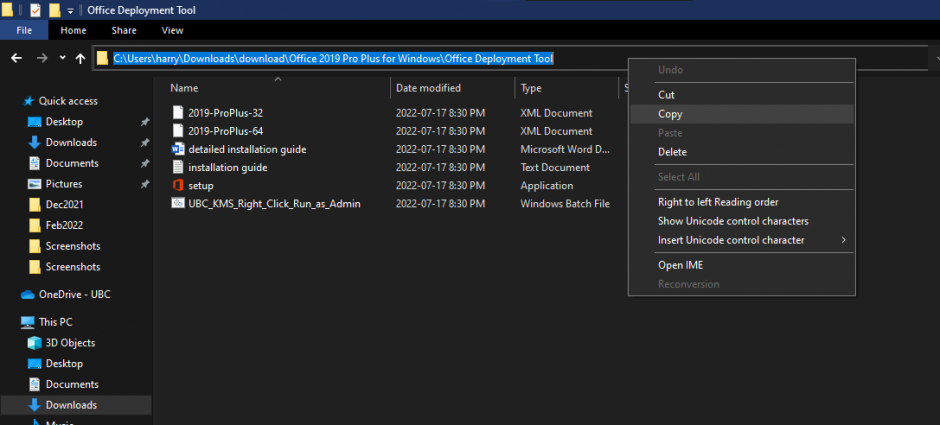
Step 2: Open up windows file explorer and locate where Office deployment tool was saved to from the prior step (usually in download folder). Copy the address up at the top when you are in the folder of the downloaded installer.
Step 3: From there go back to CMD and type cd and paste the address you copied above:

2. Initialize installation From here, when you are in the command prompt application, you have to run one of two very specific commands which are: for 64bit Office: Setup.exe /configure 2021-ProPlus-64.xml for 32bit Office: Setup.exe /configure 2021-ProPlus-32.xml (replace 2021 with 2024 if you are installing the 2024 version)

Chances are you want to install the 64 bit one, but if you’re unsure then you can check this link for more information. After deciding, simply copy and paste the command you wish to use into Command Prompt and hit enter. The installation will go through with some time and then you should have office!
3. Run KMS License Activation From here all that’s left to do is to go back to the folder that had the installation and right click the “UBC_KMS_Right_Click_Run_as_Admin” batch file and run it as an administrator. That will finish automatically and the installation should be done!
Microsoft Office 365 for Students
Students that do not have access to Office 2021/2024 can download Office 365. For more details, follow this link:
https://it.ubc.ca/services/desktop-print-services/software-licensing/microsoft-365-office-students
Microsoft Teams
MS Teams enables users across the University to connect via instant messaging, video conferencing, online meetings, and simultaneously work on a document in real-time together.
To get access to Microsoft Teams, please follow these instructions.
Microsoft Teams Sharing
These are the steps to share files from Microsoft Teams:
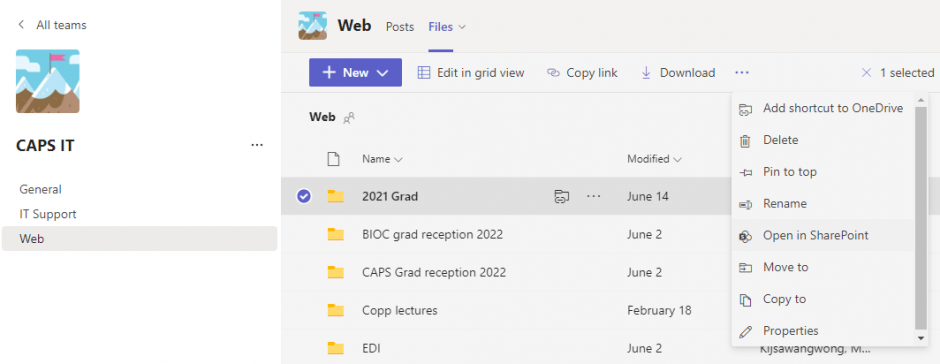
1. Find the desired file you want to share and select it with the checkmark on the left side. Then click on the 3 dots to open the submenu and select Open in SharePoint.
2. SharePoint will open up a new tab, and reselect the files you want or the entire folder and click Share on the top bar.
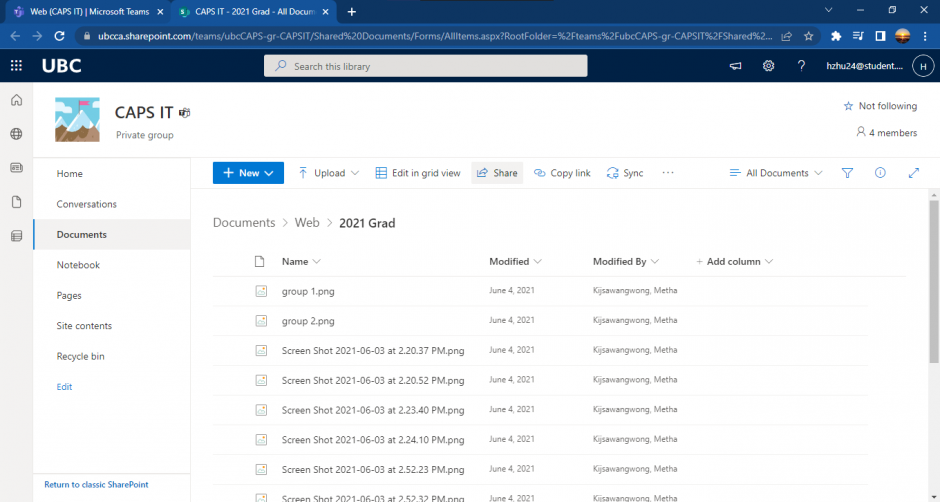
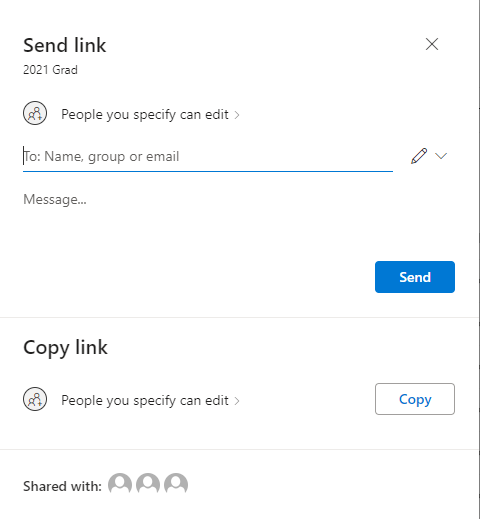
3. Choose who you want to share it with the pop up share menu.
Software Licensing
UBC IT is able to provide a variety of software programs at discounted rates and others at no cost for the university community. Statistical products, Microsoft software, and UBC administrative system software are available through IT, with the advantage of lower prices and a convenient installation process.
For more information or to purchase software for use at the Vancouver campus, please contact your local IT support or UBC IT Software Licensing.
These are the most commonly used services for faculty and staff.
- Digital Media Consultation
- Graphic Design
- Kerberos (@UBC.CA)
- Lecture Capture
- Live Event Recording & Webcasting
- Mailing Lists
- Malware Protection
- Microsoft OneDrive
- Printing Services
- Software Licensing
- Survey Tool
- TeamShare Storage Service
- UBC Collaboration Suite
- UBC Directory
- UBC Faculty & Staff Email (FASmail)
- UBC Information Security Office
- Video Production
- Websites
- Windows 10 Servicing
Working Off Campus
Technical resources that can support off-campus work. Please see this IT Guide.
Privacy Matters
How to stay safe online and protect yourself and others from being involved in an information security breach. Please see these resources.
Contacts
- For general IT questions and inquiries please email: cps.it@ubc.ca
- IT Service Centre Help Desk: Troubleshooting and resources for Adobe account, WiFi, and VPN issues
- Integrated Service Centre (ISC): Support services for faculty and staff who have questions about using Workday.